A few months ago I wrote a blog about sharing PDFs with sermons, but today I'd like to talk about uploading and sharing PDFs on any page of your church's SteepleConnect website. (If your church is signed up with SteepleConnect Premium, you will be able to do everything mentioned below!)
Churches have a lot of documents: bulletins, forms, financial data, and plenty more, but finding a way to share them on your church's website can be a challenge. Finding a way to make sure ONLY the right people see certain documents can be all but impossible. With SteepleConnect Premium, this process becomes a whole lot easier.

As an admin, you can simply go to the Media menu, and click on Files. (It's right under where you go to upload images) From here, you should see a familiar menu where you'll be able to click "Add New", select any PDF file from your computer, and upload it to your site.
Once posted, you'll be able to view a preview of the PDF (eye), edit the filename, category, and permissions (pencil), or delete the PDF in question.
By clicking edit, you'll see Name, Category, Owner, and most importantly, Permission. By setting the Permissions from "Public" to "Members Only", you'll be making sure that only approved members of your church will be able to view the PDF. This is great for sensitive data like financial information.

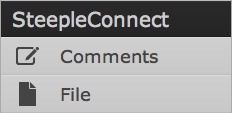
So now it's been uploaded, but how do you post the file on a page? Simply go into the page editor, and drag the "File" widget onto your page the same way you would drag in any other page element. (Hint, the File widget is under the "SteepleConnect" menu on the sidebar) You'll then be able to select a previously uploaded file, assign it an optional name, and that's it. You're done!
Note: Need to convert your documents into PDFs? We recommend BullZip which will allow you to
virtually print any document to a PDF file. It's a free download
here.